

Just a quick announcement that this Saturday, 6 May 2012, Brussels Photo Walk #8 will take place. It's going to be the first Brussels Photo Walk in 2012. The drill is as usual: we walk, take pictures, have fun and we most likely we will end up having a drink somewhere. The photo walk will be in the Park de Woluwe. We will meet at 11:30am at the corner of Avenue de Tervuren and Montagne aux Ombres (GPS 50.834301,4.42174) - link to Google Maps. Visit our Facebook group and Flickr Group.

Having problems using a Wacom pen tablet with Lightroom 4?
If you've upgraded to the Lightroom's latest version of Lightroom 4 and you're experiencing problems with using a Wacom pen tablet with it, then this very simple fix might help you - at least it helped me. For some odd reason, my pre-defined key's and shortcuts on my Wacom pen tablet didn't work at all or did different things when I upgraded to Lightroom 4. I spent hours googling, searching forums, etc. until I came up myself with this easy fix that worked for me. Wait for it.... just go to Wacom's website and head to the Driver section to download the latest installation and driver files for your Wacom product (for Europe-based customers, you can go here). Just re-install and upgrade the drivers and software, restart your computer (unusual for Macs, I even had to restart my Macbook Pro) and enjoy your Wacom pen tablet as it was before you upgraded to Lightroom 4. Yes, it is so simple :)
I'm not sure why my Wacom pen tablet didn't behave in the same way with Lightroom 4 as it did with Lightroom 3. I think it could have been an outdated Wacom's driver or software.

Shooting with the Orbis Ring Flash
I published a review of the Orbis Ring Flash a while ago and I thought to share with you some of the pictures I took using it. When I started taking pictures with the Orbis Ring Flash, I noticed it was indeed producing a relatively* good light quality and that it can also be used as a light source positioned to the side from a model and the camera. The latter changes the purpose of the ring flash a bit, which is usually to produce shadowless photography.


Using it to the side from a model creates a desired shadow and also a round reflection in the eyes, which I really like. Because the reflection is round, it looks much like the sun, therefore it looks more natural than using other light modifiers (i.e. big softboxes, etc.) - hooray!

*Ok, let me explain why I wrote relatively here: I meant to use it for a double purpose. Firstly, the light quality from the Orbis Ring Flash won't be as good as the light coming out of professional and much more expensive ring flash. Secondly, when comparing the price and the light quality of the Orbish Ring Flash, it's indeed very good.

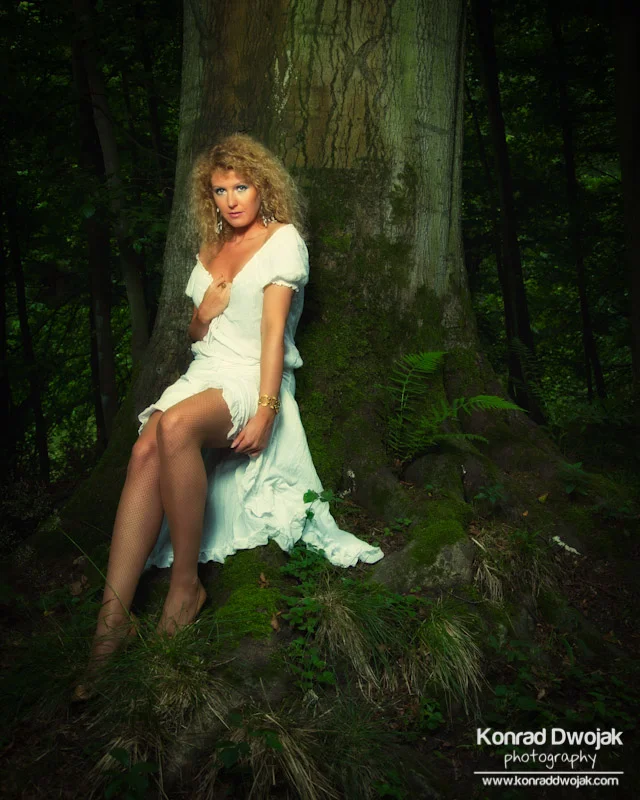
Shooting with One Light Only - Forest Nymph
I like to work with only one light during certain photo shoots, especially on-location and outdoor. Having only one light in such situations (in my case it's usually the SB-900 speedlight from Nikon) gives me lots of freedom in terms of movement from one location to the other and in terms of space. When I shoot with only one speedlight I also use an umbrella (almost 100%) and of course a light-stand. I used exactly that setup for this quick Forest Nymph shoot.

This compact and portable setup is quite small, light-weight and allows me to set it up almost everywhere because it doesn't require much space - a perfect situation for every photographer and that's why I love it. Ohh and one more advantage of using such simple setup is that I can concentrate on the subject and interact better with a person and a client instead of spending too much time on setting up the equipment and worrying too much whether or not everything is set up as it should be - this is something I've learned long time ago from Bert Stephani.
But of course, there are some shoots where I need more light, more light modificators, more equipment, and much more muscles to carry everything around :)

My thoughts on 500px vs. Flickr
There is a lot of discussion among professional photographers about both how bad Flickr has become and what great opportunities 500px gives to photographers. I have to admit that I share most of the views on these 2 services. I thought at first when 500px entered the market that would be more complementary to Flickr, however I quickly realized that 500px is actually filling the gap and opportunities that Flickr has missed long time ago.
I'm slowly abandoning Flickr and although I have a pro account at the moment, I'm having serious doubts whether or not I'll renew it in April next year. Flickr isn't a social network for photography lovers anymore and it's not even a valuable photo-sharing service anymore for me. The possibilities for valuable interactions are minimal when compared to 500px and most of the comments on the photos are just plain spam (great work, join the group blablabla or something like that - hate that!).
Although I believe that there is still lots of great work posted each day on Flickr, I find the service horribly polluted with regular pictures and it's really hard to find those good photographs, to learn from others. Not to mention, getting valuable and constructive criticism on your work is almost impossible. I have to admit here that I'm not as active in posting comments on Flickr as I used to be. There are several reasons but I think that the main one is that 500px (not to mention Google Plus which is HUGE among photographers but it requires a different blog article) is much more valuable and reacher for photography enthusiasts. I prefer to explore photographs on 500px and spend my time there rather than on Flickr and the reason is simple: 500px enforces you to upload only the best shots - that's how the community and the system (for free accounts) are made. The work there is stunning, the comments you give and receive are truly valuable (at least most of them) and you can easily get constructive criticism on your work and learn from it.
It's really up to you and your preferences if you want to use any of these services and which one to choose. In fact, you can choose more than one but it's also the time issue for me - being on too many photography services is a bit of a waste of time for me. I just prefer value over quantity :)
Do-it-yourself: Speedlight Snoot in 2 minutes
Have you ever wanted to have a speedlight snoot at almost no cost that is very easy to make yourself? You can make one within 2 minutes at almost no cost from an empty box of Pringles. It's very inexpensive, easy to make and it will take just a couple of minutes of your time to make one. Believe it or not but all you need is an empty box of Pringles and scissors. Take the box and cut out the bottom. Next, all you need to do is to slide it over your speedlight. You'll probably notice that the round shape of the Pringle's box is not exactly the shape of the speedlight's head so it might be necessary for you to adjust the box a bit when you do it the first time. And here it it: almost at no cost, ready in 2 minutes, a home-made speedlight snoot.
Orbis Ring Flash Review
It gets dark and gloomy outside now in autumn so it's a perfect opportunity to do a review of a product that will lighten things up a bit - a ring flash. I got my hands on the Orbis Ring Flash (and the Orbis arm) already some time ago but I didn't have time until now to sit down and write a proper product review. But before going into details with the Orbis Ring Flash review, let me just highlight few things about ring flashes and what they are for those of you who hear about them for the first time. A ring flash is basically a circular flash which provides even illumination and therefore almost shadowless results. Ring flashes are popular in macro photography but also in portrait and fashion photography. The unique features of a ring flash make shadows much softer and create circular catch-eye / highlights in the subject's eyes, not to mention an interesting light halo effect.
I. Features of the Orbis Ring Flash
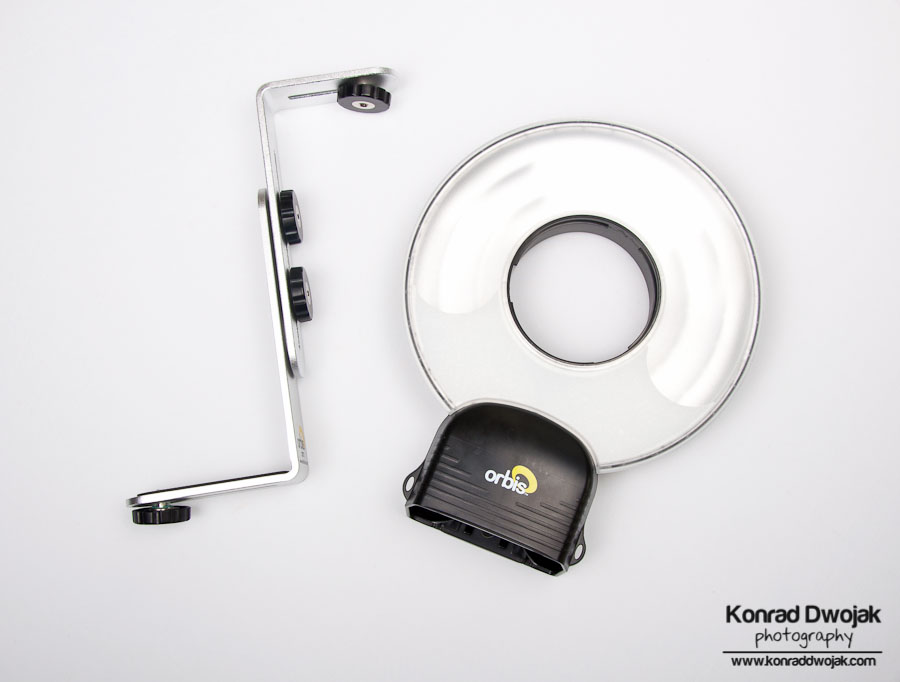
The first thing I noticed when I got my Orbis Ring Flash was the size of the reflecting area which is bigger when compared to other similar ring flashes. This means that the light source will also be bigger creating even softer light. I probably should have mentioned earlier that the Orbis Ring Flash is not a typical ring flash but it's an add-on on your speedlight. In other words, you can slide your speedlight into the Orbis Ring Flash to produce the desired light. This makes the ring flash portable because you don't need to connect it to a power source, which is usually required with the traditional ring flashes. The Orbis Ring Flash fits with most speedlights available on the market nowadays and it fits perfectly with my Nikon SB-900. Although it requires a bit of force to slide my SB-900 into it, the speedlight sits there tight and secure.

The other thing I got with my Orbis Ring Flash was what they call an Orbis Arm which is basically a mounting bracket for your camera and the speedlight with the Orbis Ring Flash on it. I used this setup recently while shooting an event in Gent, Belgium (yes, ring flashes are usually for close-ups, fashion and makro but they have many other uses as well) and I found the mounting bracket (Orbis Arm) quite useful but extremely heavy to carry around - this is because of the total weight of my DSLR (with a battery grip), speedlight SB-900 and the Orbis Ring Flash (I have to mention that the Orbis Ring Flash is relatively light-weighted by itself). Therefore, I recommend using this setup either on short assignments (preferably indoor where you can easily put aside it to let your arms rest) or on a tripod (the Orbis Arm supports tripod mounting but I haven't tested it myself yet and it probably won't fit onto all of the tripods due to its L-like shape.However, what I have noticed is that it was very hard to operate my zoom lens (18-100mm) while having the ring flash on the mounting bracket - no matter how I adjusted the ring flash around my lens, it was always getting in way with the zoom ring on the lens.
Another important aspect to consider is a way you will trigger your speedlight. In general, you have 3 options: (1) you can use a built-in flash commander in your camera, (2) use a wireless flash trigger or (3) use a sync cord (TTL cable). I prefer the third option because it's much more reliable (especially when you use the Orbis Arm and your built-in flash commander is hidden behind the ring flash which might not always communicate well with a speedlight which is positioned below the camera) and I don't like having fragile wireless receivers hanging below my speedlight when operating the ring flash in my hand.
II. Light Quality and Light Distribution
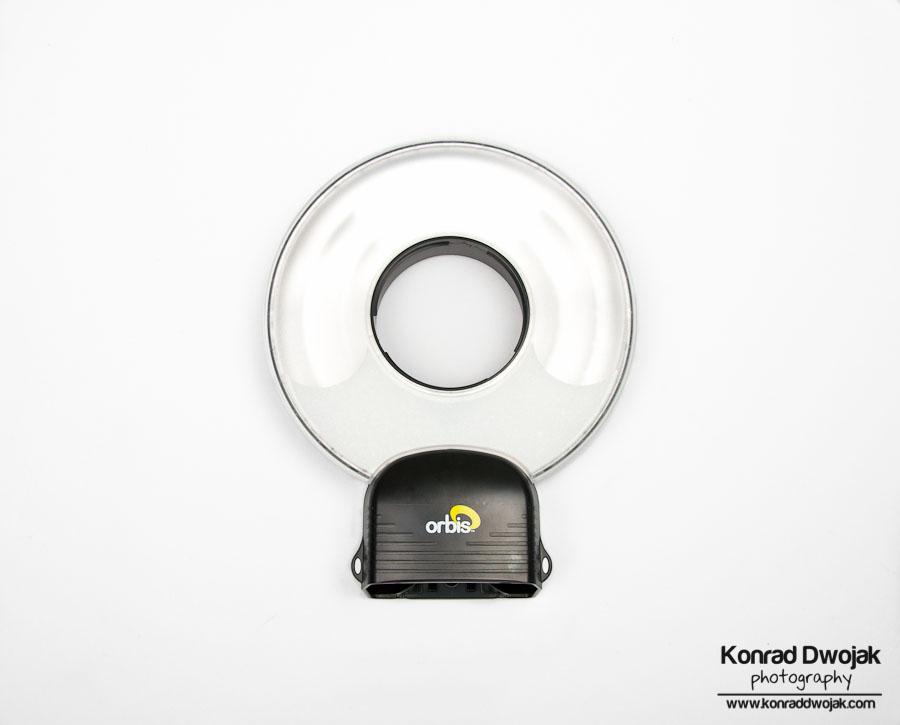
I did few photo shoots with the Orbis Ring Flash so far and I'm very happy with the light quality. It acts exactly as a ring flash should behave and produces the desired light. However, you have to remember that the power of light will most likely be less than in stand-alone ring flashes. This is due to 2 factors: (1) the power of light produced by the speedlight depends on your speedlight's power capabilities which is sometimes less than stand-alone ring flashes and (2) some of the light's power produced by a speedlight is lost in the ring flash itself as it travels across the mirrors before it's out towards your subject - this is a normal and expected behavior for such add-on ring flashes.
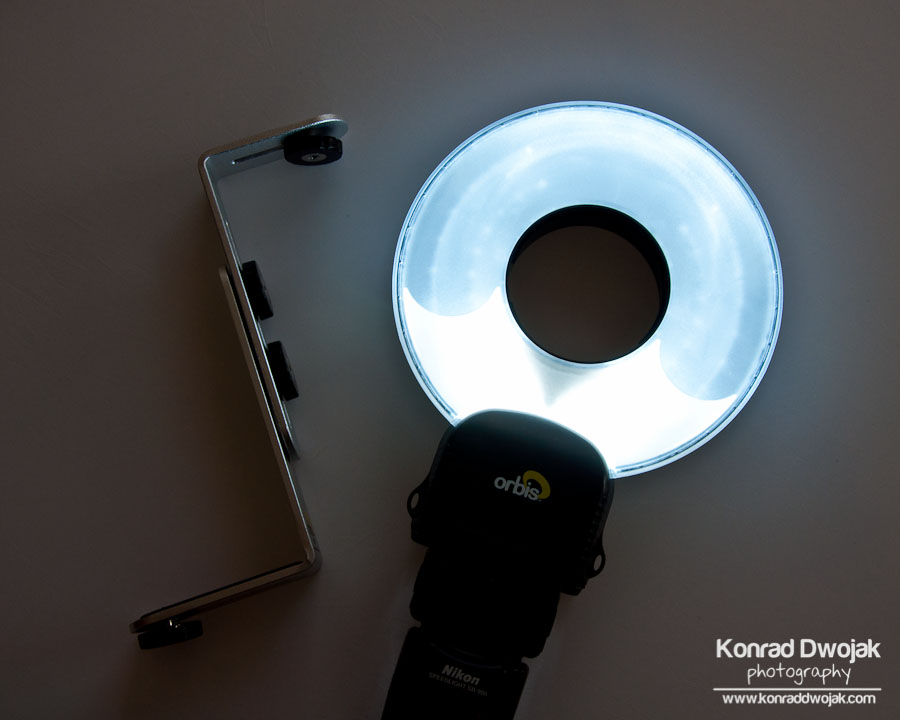
The pictures in this article clearly show that the Orbis Ring Flash has a very good light distribution and dispersion across the whole ring when comparing the opposite sides of the ring flash where the speedlight is inserted. In fact, the Orbis Ring Flash has an additional white coating on the side of the speedlight. This prevents the stronger light from dominating the rest of the light in the ring flash and ensures more or less equal light distribution.

III. Price vs. Quality vs. Product Ratio - Summary
I like to compare the product's price to its quality and overall purpose and my needs as a photographer. Before anything, you have to realize that Orbis Ring Flash might not be necessary a good choice for you, especially if you know that you won't be taking any outdoor macro/fashion shots and that you'll have a different use for your speedlights indoor other than using it with a ring flash (for example to do hair-light, background light etc.). However, if you're like me who takes lots of pictures outdoor and on-location, who looks for a versatile product and doesn't mind using one of the speedlights as a ring flash, then Orbis Ring Flash is perfect for you. The quality of the product is very high and seems to be durable (just don't throw it from the second floor to test its durability). When it comes to price I have to say it's a bit expensive - you can get the Orbis Ring Flash System (the ring flash with the mounting bracket) from their online store for $249. However, if you compare this price to the self-contained AlienBees ring flash which is on the market for around $399, then the Orbis system might look expensive. Overall - is it worth it the price?-Yes.

One Minute Portrait with Natural Light
Taking good (portrait) pictures doesn't require expensive equipment. Sometimes, all you need is the knowledge about natural light and how it behaves and it can take just a minute to take a nice portrait picture. That's all what it took me to take this picture - simple yet beautiful (at least to my personal opinion). I took the photograph with the subject standing very close to a window which was also covered with white-neutral cloth. This way I got a double-diffused natural light. It was all that simple! If you would like to learn more about light, how to use it to your benefit to get amazing shots, I highly recommend Bert Stephani's Motivational Light DVD.

Joker is Alive and He Wants to Put Smile on Your Face
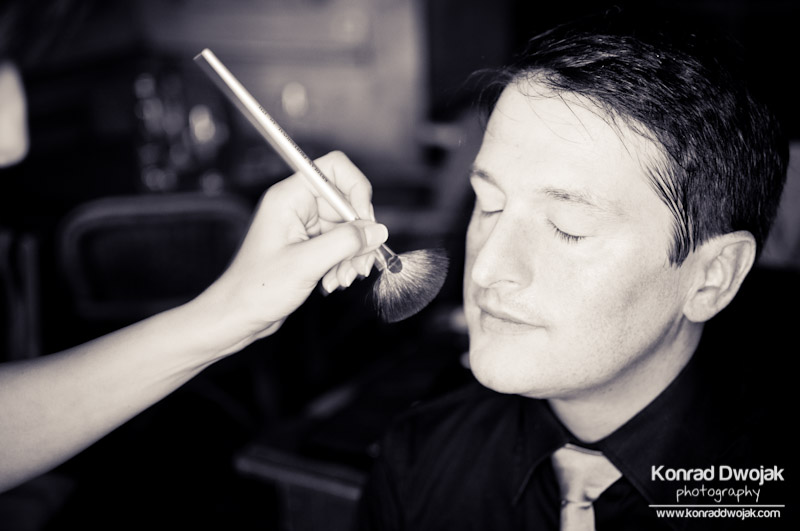
I had a great privilege to work recently on an artistic photography portfolio for a French actor. While most portfolio photo shoots for actors are quite standard (front face shots and profile shots), we have decided to do something more artistic and unique. So we came up with so many great ideas during the brainstorm session that we had to narrow down the project to 3 thematic shoots. One of them was the Joker photo shoot and as it turned out, the Joker is still alive and he wants to put a smile on your face.

My make-up artistic did a great job with preparing the actor in less than an hour while I was busy fixing my strobe set-up which just broke minutes before (but I managed, hooray!). It took us a couple of hours to get all the different shots we wanted and it was really worth it. Everyone liked the more gruesome, bloody and horror-like shots more than other photographs. It made me really happy because I was afraid at first that these gruesome photographs were in fact too much over the top.

What helped us a lot is that we had a very specific goal and we planned the shoot from the very beginning till the very end - good planning helps a lot during a photo shoot, believe me. Although I still like to improvise during shoots (I do it quite often and mostly during TFP-like shoot for models), I also appreciate a good pre-defined and detailed plan for a photo shoot. The main lesson learned for me from this photo shoot was to be patient to my photo gear and to myself. I often stress out when a client has to wait for me so I can reposition the light, change this or that. However, I have never experienced having an impatient client and everyone appreciates the results at the end.


How to shoot HDR Without A Tripod?
When you shoot HDR (high dynamic range) photography you have to keep in mind to keep the camera steady for all the shots (under-exposed, over-exposed and with proper exposure). The best solution of course is to put a camera on a tripod but what to do when you would like to shoot HDR but you don't have a tripod with you? Is it possible to shoot HDR without a tripod and still end up with good HDR photograph? The short answer is: Yes, but you need to remember about few things to eliminate any camera movement between the shots.
I didn't use a tripod while taking the HDR picture in this article. Instead, I used what was available for me (wall of a bridge) and few settings in my Nikon. Firstly, I put my camera into the bracketing mode (duh!), set up f-stop, got the camera to set up the focus in the auto-focus mode and I turend the autofocus off. I also changed the shooting mode from single into the continuous burst mode - this is very important when you don't have a tripod because it allows you to take very quickly one shot after another, minimizing the time interval between the shots and therefore limiting any possible camera movement between the shots. Finally, I found a spot on the bridge's wall where I could position my camera against it, I held the camera firmly and I shot. It was so simple!
To summarize in step what you need to do when you want to shoot an HDR picture without a tripod:
1) Set a camera to the bracketing mode
2) Change the shooting mode to continuous burst mode
3) Set up your f-stop (I suggest as big f-stop as possible for landscapes), let the camera meter focus and lock it by switching into the manual focus mode
4) Find a place where you can put your camera on or against (table, wall, horizontal ground, etc.)
5) While holding the camera firmly, press the shutter button and let the camera do one after another (in continuous burst mode) the bracketed shots