
I think that any bottle (glass) product photograph is both quite challenging and also very rewarding. The main challenge comes from being able to constrain the reflections, make them soft and elegant and and to use them to your profit in order to create an interesting image. This type of product photography can get complicated pretty fast, especially when you’re dealing with many weird reflections and light sources. Therefore, sometimes the simplest solutions are the best. I have recently photographed a Rusack Wine Bottle and I started off with my typical setup and two light sources. My vision of the final image was a clean, classic and elegant image of the bottle but I also wanted to make it challenging for myself. The challenge? To have the already black bottle on black background.

Speed light behind white plexiglass
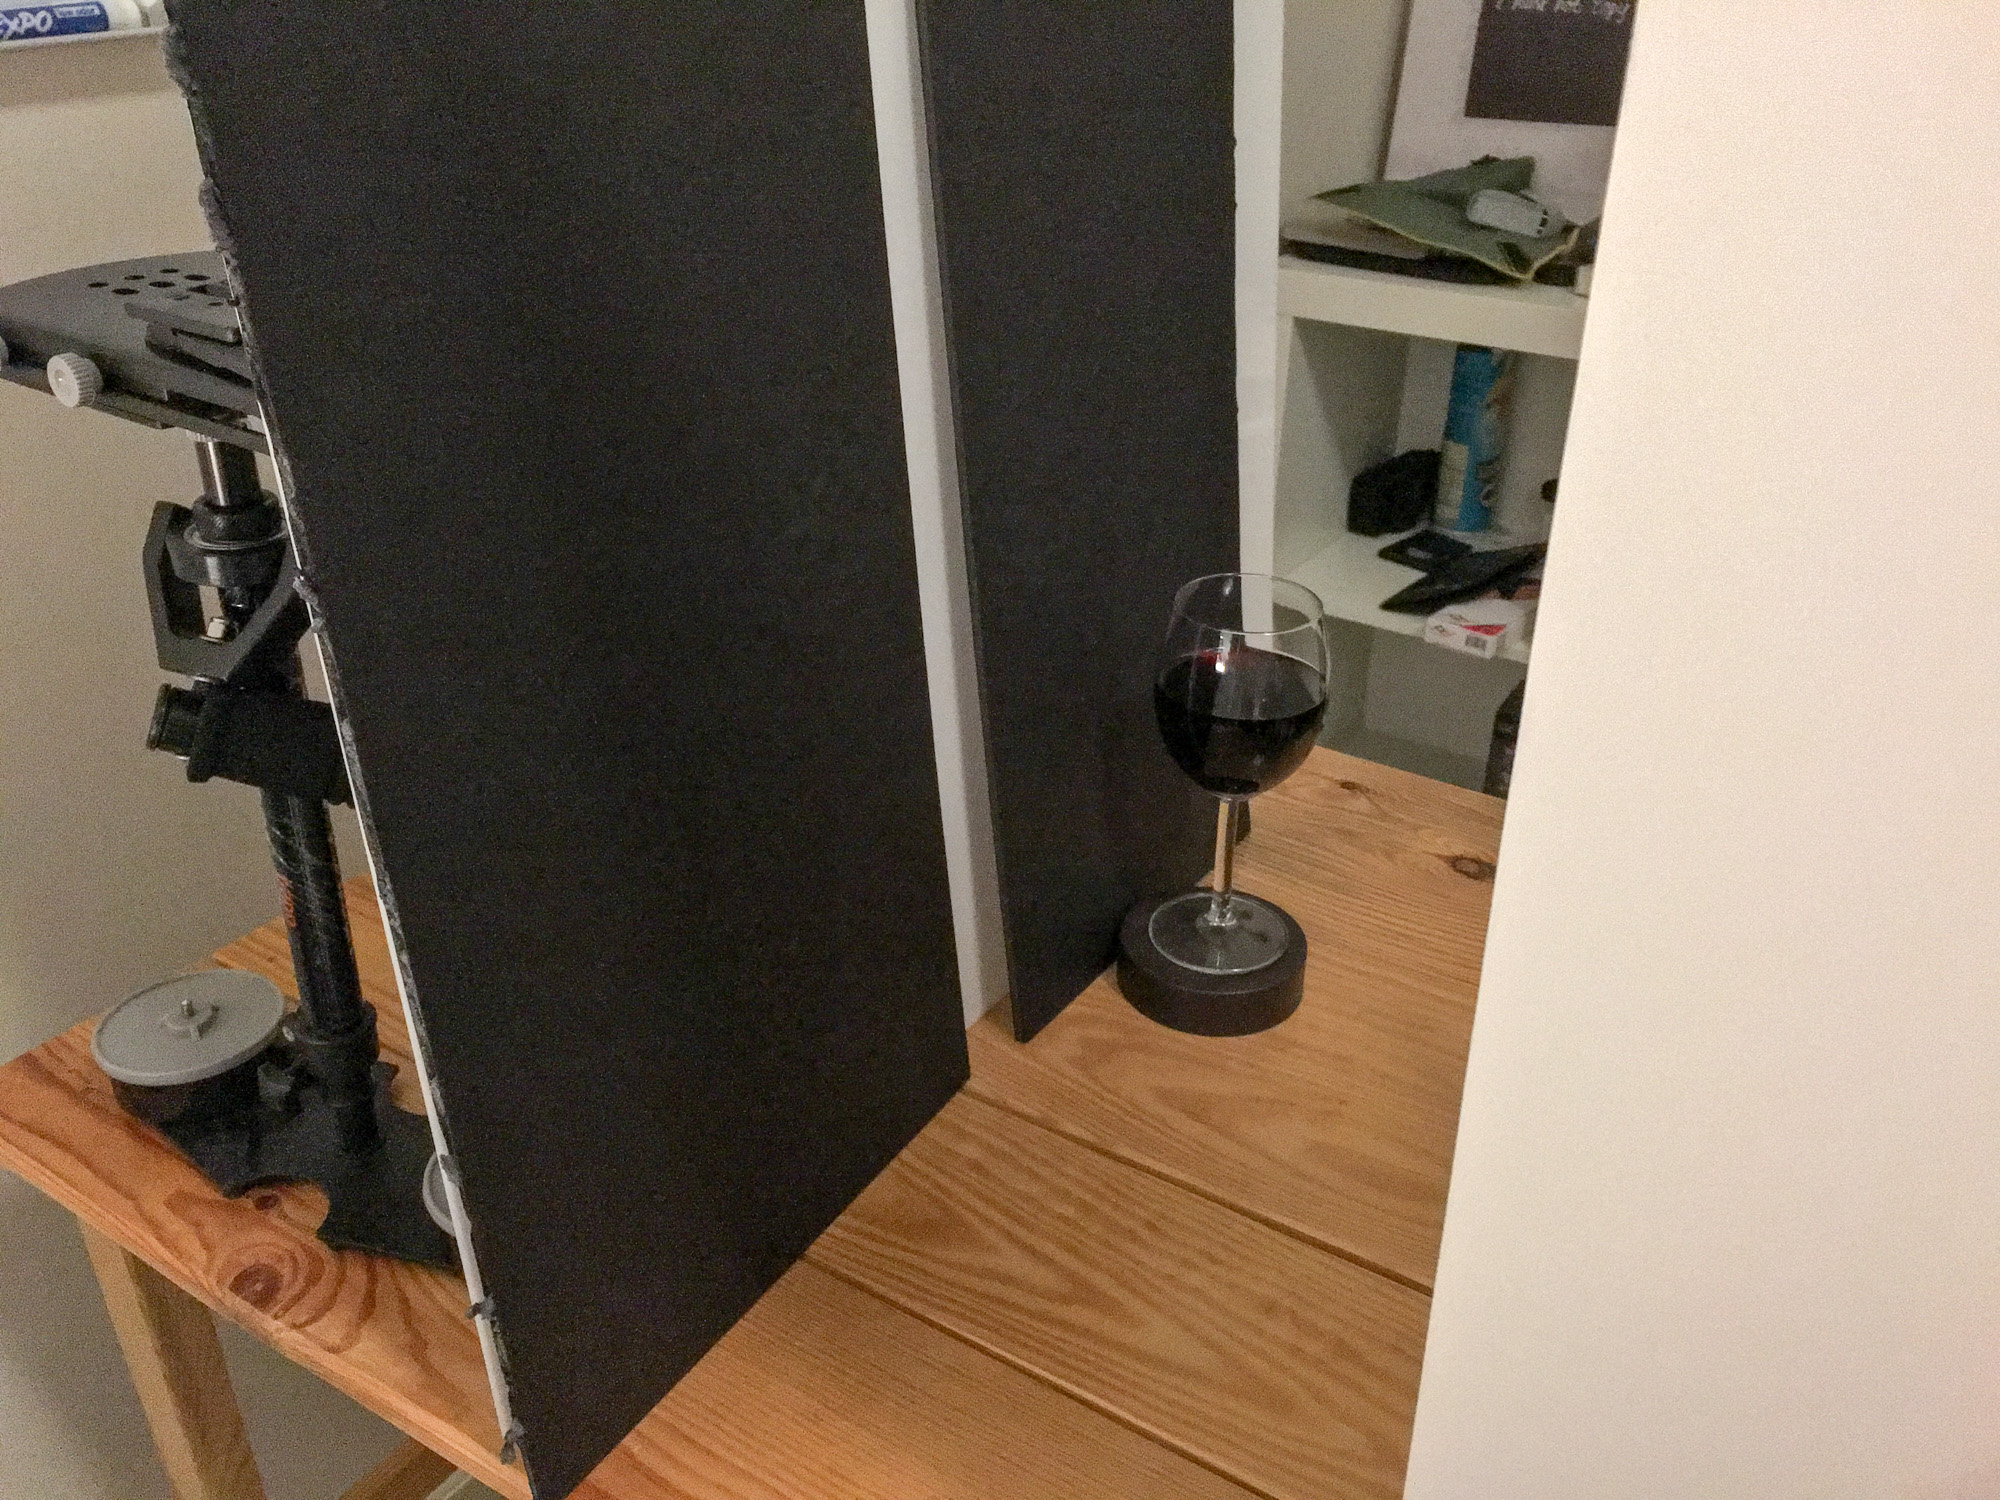
Two black foam board on each side
I eliminated one of the lights after several trials and errors (mostly errors of trying to use the lights on both sides of the bottle). I placed the remaining speedlight behind the bottle and put a white plexiglass between the light source and the bottle. Next, I placed two black foam core boards on each side of the bottle in order to have black background. I left a very tiny space (not visible in the final picture) just behind the bottle for the light to go through. Last but not least, I used two white foam boards on each side of the bottle in order (see pic below) to get nice highlights on both sides. Once I photographed the bottle, it was time for the wine glass. I simply placed the glass in the background, a bit to the right from where the bottle was standing and I repositioned the white foam boards to have the highlights uniform on both sides of the glass. I ended up having two images which I brought to Photoshop for editing.
